Windows Management Instrumentation (WMI) is a
powerful tool that gives you access to just about every aspect of
Windows Home Server and of remote computers. With WMI, your scripts can
manage applications, systems, devices, networks, and much more. WMI
consists of a series of classes that implement various properties and
methods that you can access using your scripts. For example, the Win32_OperatingSystem class represents the computer’s operating system. Its properties include InstallDate, the date and time the OS was installed, and LastBootUpTime, the date and time when the OS was last started; its methods include Reboot for restarting the computer and SetDateTime for setting the system’s date and time.
Note
WMI is massive. It has
hundreds of classes that you can use, although you’ll mostly use the
Win32 classes, which enable you to manage the operating system,
hardware, and applications, and to monitor performance. For the complete
WMI reference, see http://msdn.microsoft.com/en-us/library/aa394582.aspx.
Referencing the WMI Service Object
Your WMI scripts will always begin by setting up a variable for the WMI service object. One way to do that is to create the SWbemLocator object and use it to connect to the WMI service. Here’s the code:
strComputer = "localhost"
Set objLocator = CreateObject("WbemScripting.SWbemLocator")
Set objWMI = objLocator.ConnectServer(strComputer, "root\cimv2")
objWMI.Security.ImpersonationLevel = 3
That works fine, but most scripts use a shortcut method that reduces to just a couple of statements:
strComputer = "localhost"
Set objWMI = GetObject("winmgmts:{impersonationLevel=impersonate}!\\" & _
             strComputer & "\root\cimv2")
Tip
I like to use localhost to reference the local computer because it’s straightforward and easy to read. However, you can also use just dot (.) to refer to the local machine:
strComputer = "."
Set objWMI = GetObject("winmgmts:{impersonationLevel=impersonate}!\\" & _
              strComputer & "\root\cimv2")
Returning Class Instances
After
you have your WMI service object, you can use it to access a class.
Each class is really a collection of instances, or actual
implementations of the class. For example, the Win32_UserAccount class consists of all the user accounts defined on the computer. Each user account is an instance of the Win32_UserAccount class. To access the instances of a class, you can use either of the following WMI object methods: ExecQuery or InstancesOf.
The ExecQuery method executes a SELECT query using the WMI Query Language (WQL). In general, this method uses the following form:
object.ExecQuery("SELECT * FROM class")
| object | A variable that references the WMI object. |
| class | The WMI class you want to work with. |
For example, the following method assumes the WMI object is referenced by the objWMI variable, and the query returns all the instances of the Win32_UserAccount class:
objWMI.ExecQuery("SELECT * FROM Win32_UserAccount")
The InstancesOf method uses the following syntax:
object.InstancesOf("class")
| object | A variable that references the WMI object. |
| class | The WMI class you want to work with. |
For example, the following method assumes the WMI object is referenced by the objWMI variable, and the code returns all the instances of the Win32_UserAccount class:
objWMI.InstancesOf("Win32_UserAccount")
Which method should you use? If you want to work with all instances of a
particular class, either method is fine, and you may gravitate to the InstancesOf method only because it’s slightly shorter. However, if you want to work with only a subset of the instances, the ExecQuery method is better because you can add a WHERE
clause to the WQL statement. For example, if you just want to work with
the account named Administrator, the following code returns just that
instance from the Win32_UserAccounts class:
objWMI.ExecQuery("SELECT * FROM Win32_UserAccount " & _
                 "WHERE Name = 'Administrator'")
Both ExecQuery and InstancesOf
return a collection object that contains the class instances. You
usually store that collection in a variable, as in this example:
Set objUsers = objWMI.ExecQuery("SELECT * FROM Win32_UserAccount")
You could then use a For Each...Next loop to run through the collection and perform some action on each instance. For example, Listing 1 presents a script that runs through all the instances of the Win32_UserAccount class, stores the Name and Fullname properties for each user in a string, and then displays the string.
Listing 1. Script That Runs Through the Instances of the Win32_UserAccount Class
Option Explicit
Dim strComputer, strUserInfo
Dim objWMI, objUsers, objUser
'
' Work with the local computer
'
strComputer = "localhost"
'
' Get the WMI service
'
Set objWMI = GetObject("winmgmts:{impersonationLevel=impersonate}!\\" & _
                       strComputer & "\root\cimv2")
'
' Store the instances of the Win32_UserAccount class
'
Set objUsers = objWMI.ExecQuery("SELECT * FROM Win32_UserAccount")
'
' Initialize the display string
'
strUserInfo = ""
'
' Loop through the instances
'
For each objUser in objUsers
     strUserInfo = strUserInfo & objUser.Name & " (" & _
                                objUser.FullName & ")" & vbCrLf
Next
'
' Display the string
'
WScript.Echo strUserInfo
'
' Release the objects
'
Set objWMI = Nothing
Set objUsers = Nothing
Set objUsers = Nothing
|
In many cases, the
class only returns a single instance, either because the class only has
one instance or because you used the WQL WHERE clause to restrict the class to a particular instance. Either way, you still need to use a For Each...Next loop to extract the data from the instance.
As an example, consider the script in Listing 2.
Listing 2. Script That Displays BIOS Data
Option Explicit
Dim strComputer, strBIOS
Dim objWMI, objBIOS, objItem
'
' Get the WMI service
'
strComputer = "mediapcrver"
Set objWMI = GetObject("winmgmts:{impersonationLevel=impersonate}!\\" & _
             strComputer & "\root\cimv2")
'
' Get the BIOS instance
'
Set objBIOS = objWMI.ExecQuery("SELECT * FROM Win32_BIOS " & _
                               "WHERE PrimaryBIOS = true")
'
' Initialize the display string
'
strBIOS = "BIOS Data for " & UCase(strComputer) & ":" & vbCrLf & vbCrLf
'
' Collect the BIOS data
'
For Each objItem in objBIOS
        strBIOS = strBIOS & _
           "BIOS Name:" & vbTab & objItem.Name & vbCrLf & _
           "Manufacturer:" & vbTab & objItem.Manufacturer & vbCrLf & _
           "BIOS Version:" & vbTab & objItem.Version & vbCrLf & _
           "SMBIOS Version:" & vbTab & objItem.SMBIOSBIOSVersion & vbCrLf & _
           "BIOS Date:" & vbTab & ConvertToDate(objItem.ReleaseDate)

Next
'
' Display the string
'
WScript.Echo strBIOS
'
' Release the objects
'
Set objWMI = Nothing
Set objBIOS = Nothing
Set objItem = Nothing
'
' This function takes a datetime string and
' converts it to a real date object
'
Function ConvertToDate(strDate)
    Dim strYear, strMonth, strDay
    strYear = Left(strDate, 4)
    strMonth = Mid(strDate, 5, 2)
    strDay = Mid(strDate, 7, 2)
    ConvertToDate = DateSerial(strYear, strMonth, strDay)
End Function
|
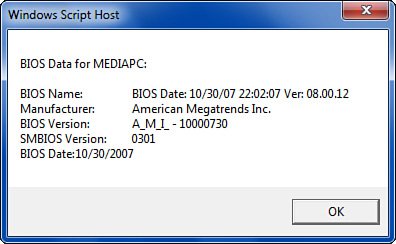
This script uses ExecQuery to return the instance of the Win32_BIOS class that represents the computer’s primary BIOS (that is, where the PrimaryBIOS property equals true). Then a For Each...Next loop runs through the single instance and uses a string variable to store the values of five properties: Name, Manufacturer, Version, SMBBIOSBIOSVersion, and ReleaseDate. The last of these is converted to a proper date object using the ConvertToDate function. The script then uses the Echo method to display the results, as shown in Figure 1.
Scripting a Remote Computer
In the WMI examples you’ve seen so far, I’ve used localhost as the value of the strComputer variable, which connects to the local computer’s WMI service:
strComputer = "localhost"
Set objWMI = GetObject("winmgmts:{impersonationLevel=impersonate}!\\" & _
             strComputer & "\root\cimv2")
You may have noticed that in Listing 30.11, I did something a bit different:
strComputer = "mediapc"
Set objWMI = GetObject("winmgmts:{impersonationLevel=impersonate}!\\" & _
             strComputer & "\root\cimv2")
In this case, I used the name of the local computer—mediapc—instead of localhost.
However, WMI scripting doesn’t restrict you to working only with the
local machine. In fact, WMI was created so that IT types and network
admins could manage remote computers on the network. This means that
it’s almost trivial to configure a script to run on a network client:
Note
Unfortunately,
scripting remote Windows Vista and Windows 7 computers only works if
those PCs have User Account Control turned off. When UAC is activated on
a remote computer, your script will always generate “Access Denied”
errors (even if you run the script under the Administrator account).
Because UAC is such an important part of the Windows 7 and Windows Vista
security models, turning UAC off just to access remote machines in
scripts isn’t worth it.
Listing 3 shows a script that returns disk drive information from a remote computer.
Listing 3. Script That Displays Disk Drive Data for a Remote Computer on the Network
Option Explicit
Dim strComputer, strDriveData
Dim objWMI, objDrives, objDrive
'
' Get the WMI service
'
strComputer = "officepc"
Set objWMI = GetObject("winmgmts:{impersonationLevel=impersonate}!\\" & _
    strComputer & "\root\cimv2")
'
' Get the instances of hard disk drives (MediaType = 12)
'
Set objDrives = objWMI.ExecQuery("SELECT * FROM Win32_LogicalDisk " & _
                                  "WHERE MediaType = 12")
'
' Initialize the display string
'
strDriveData = "Disk Drive Data for " & UCase(strComputer) & ":" & vbCrLf & vbCrLf
    strDriveData = strDriveData & _
        "Letter:" & vbTab & _
        "Name:" & vbTab & _
        "System:" & vbTab & _
        "Size:" & vbTab & _
        "Free:" & vbTab & _
        "% Free:" & vbTab & vbCrLf & _
        "=====" & vbTab & _
        "=====" & vbTab & _
        "=====" & vbTab & _
        "=====" & vbTab & _
        "=====" & vbTab & _
        "=====" & vbTab & vbCrLf
'
' Collect the drive data
'
For Each objDrive In objDrives
    strDriveData = strDriveData & _
        objDrive.Name & vbTab & _
        objDrive.VolumeName & vbTab & _
        objDrive.FileSystem & vbTab & _
        FormatNumber(objDrive.Size / 1073741824, 1) & " GB" & vbTab & _
        FormatNumber(objDrive.FreeSpace / 1073741824, 1) & " GB" & vbTab & _
        FormatPercent(objDrive.FreeSpace / objDrive.Size, 1) & vbTab & vbCrLf

Next
'
' Display the string
'
WScript.Echo strDriveData
'
' Release the objects
'
Set objWMI = Nothing
Set objDrives = Nothing
Set objDrive = Nothing
|
The script begins by setting the strComputer variable to officepc,
which is the name of the client computer on my network. The script then
gets the remote computer’s WMI service and uses it to return the
instances of the remote computer’s Win32LogicalDisk class, which represents a computer’s logical disk drives. In this case, I’m only interested in the hard drives, so I use the WHERE clause to return only those disks where the MediaType property equals 12.
Note
If you want to examine a computer’s removable media drives (except its floppy drives), use WHERE MediaType = 11. Floppy drives use various values for the MediaType
property, depending on the floppy format (3.5 inch versus 5.25 inch),
the size (for example, 1.2MB or 1.44MB), and the number of bytes per
sector (for example, 512 or 1024).
The script initializes the strDriveData display variable, and then it uses For Each...Next to loop through the hard drive instances. In each case, six values are added to the strDriveData string: the Name (drive letter), VolumeName, FileSystem, Size, and FreeSpace properties, and a calculation of the percentage of free space available. The strDriveData string is then displayed using the Echo method. Figure 2 shows an example.
